AlreadyPrepared.com
Our Blog
AlreadyPrepared.com
Prepared Already



Emergency Preparedness & Planning
Issues - Strategies - Solutions - Resources
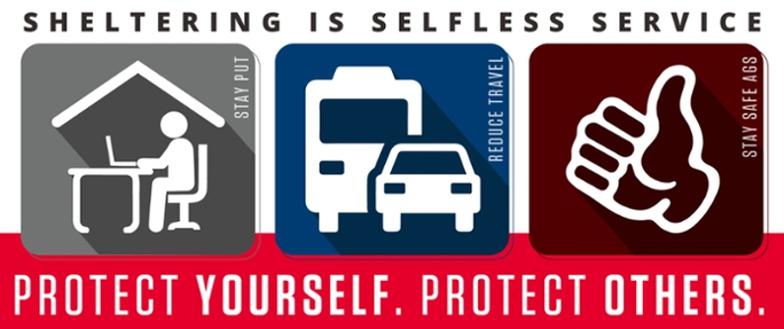
How to Shelter-In-Place
Holiday, FLA Friday, 7.31.26
1. Lock all Car & House Windows including Interior & Exterior Doors.
Your windows and doors should be locked and shut tight. Any open windows or doors will present an extreme danger to all the passengers inside your vehicle and residents inside your home.
2. Turn off all fans, heating and A/C systems to avoid drawing in outside air.
If you are inside your home or vehicle ensure you turn off all the fans for heating or air conditioning. That includes internally circulating air inside your car. While many manufacturers have significantly improved air filters, it's never worth the risk of drawing deadly chemicals into your vehicle or home.
3. Get out your emergency kit, radio and N95 masks
Take out the N95 masks that are included inside your emergency kit and securely fasten them around your mouth and nose. Take out your emergency radio and listen for any emergency broadcasts regarding the shelter-in-place advisory.
4. Go to a room that's above ground with no windows
If you're inside your home, go to a room that has no windows and is above ground level. Doing this ensures you have the best possible chance of reducing your exposure to poisonous chemicals. Some chemicals are heavier than others and can't travel above ground. For that reason, its prudent to take shelter above ground.
5. Use duct tape located inside your emergency kit to seal all cracks around doors and vents.
Use the duct tape from your emergency kit to seal all the cracks around your windows and doors; inside your vehicle or at home. The gap between your doors and windows becomes the most vulnerable point of exposure. A tiny hole can expose you to harmful chemicals and result in significant injury. For this reason, duct tape is used to help create an airtight seal to ensure your safety.
Follow these steps and be ready the next time an order to shelter-in-place is announced. Remember have your personal emergency kit and roadside emergency kit available at all times, it's not just a bag, it's your family's life.

EarthDate: January 22, 2026
Below is an important message...
Palm Harbor, FLA. Friday, 7.31.26
ALERT: Russia To The United States In 86 secs...
86 seconds!
That’s how long it would take for a missile to reach the United States if it was launched from Russia…
Let that sink in.
That’s less time than it takes most people to read this information.
And the worst part is, we wouldn’t even see it coming.
But while everyone is worried and looking to the sky for signs of potential danger
A bigger threat is lurking.
One that we have no way of defending against.
While any democratic administration is preoccupied with pronouns, restrictions, and censoring its people —
The Ruskies have been silently sharpening their ax. And they’re ready to deliver one final blow.
According to a recent government document, Putin’s people have already infiltrated America’s Achilles’ Heel. And if this report is right, may God have mercy on all of us
PLANNING FOR A
COMING FOOD CRISIS
Holiday, FLA Thursday, 7.30.26
We are very concerned that most people in the United States are treating the current (and coming) food crisis as no big deal.
Most people actually believe the government is going to help them and that the illegitimate President Biden and his buffoons in the White House are going to solve everything…
Even though, we’ve been warned multiple times and the head of the World Food Program at the UN has said the food crisis is going to be “Hell on Earth.”
Also, frighteningly, as one news outlet reported…
“Levels of food insecurity have doubled from 2019, increasing from 135 million to 276 million.”
And there’s this too…
“Dozens of countries risk protests, riots and political violence this year as food prices surge around the world, the head of the food-aid branch of the United Nations has warned.”
So, what is your plan to survive the worst food crisis in decades?
Here’s a list of things you should be doing (in no particular order) …
-Emergency supply of cash (at least 3 months’ worth of living expenses)
-Plenty of garden tools
-Chickens
-Generators (solar, propane, gas)
-Canned fruit
-Water filters
-At least 5,000 rounds of ammunition for every caliber of gun
Get your hands on and immediately store...
-Batteries
-Extra razors so you can shave
-Multiple solar panels for your solar generator
-Large emergency first aid kit
-Extra antibiotics
-Extra allergy medicine (I take Zyrtec)
-Lots of peanut butter
-Powdered milk
-Several 5-gallon buckets
-Toilet paper
-Lots of extra soap, shampoo, tooth brushes, toothpaste
-Food in buckets (grains)
-#10 cans of food storage
-At least 6 months of survival food pouches for every member of your family.
Remember, you will always need more food than you think.
Plus, you may be helping others as well.




Keeping Up With Lightning Protection And
Other Important Services For Safety And Reliability
Tampa, FLA. Friday, 7.31.26
A lightning protection system (LPS) is a network of parts that is set up to keep lightning from harming buildings and electrical equipment. Conducting materials, grounding electrodes, air terminals (lightning rods), and bonding components are all common parts of these kinds of systems.
To reduce these risks, it is important to have full lightning protection systems that need to be kept up all the time.
How to Understand a Lightning Protection System
A lightning protection system (LPS) is a network of parts that is set up to keep lightning from harming buildings and electrical equipment. Conducting materials, grounding electrodes, air terminals (lightning rods), and bonding components are all common parts of these kinds of systems. When an LPS is made and put in the right area, there is reduced likelihood of fire, damage to buildings, and electrical surges since it gives lightning current a low-resistance path.
How to take care of lightning protection and why it's important
The best approach to make sure that the Lightning Protection Maintenance works well and easily is to maintain it up to date. Routine maintenance includes checking connections and bonding, testing grounding systems and conductors, and looking at things visually.
Some important things to do to keep lightning protection working are:
A visual check can find things like physical damage, rust, loose connections, and missing pieces.
To make sure the system can withstand lightning current, it has to pass continuity testing. This means checking that the wires and connectors are all connected to each other.
Routine maintenance that finds any problems before a lightning incident can save the system from failing and make it safer.
Keeping electrical devices safe
A lightning protection system protects the building from lightning strikes and switching operations What is included are:
Checking SPDs for signs of wear, discoloration, or damage.
During functional testing, we check how well the gadget can clamp voltage spikes.
Removing and replacing SPDs that have stopped working or are broken because of prior surges.
How lightning may affect things
Before building or changing a lightning protection system, you need to do a lightning risk analysis. This approach figures out how probable it is that lightning will hit a given place and how much harm it may inflict if it does.
A full lightning risk study includes things like these:
Places where lightning strikes more often need more protection, and this is affected by where they are.
Height and construction of buildings: Buildings that are very tall or have materials that might catch fire are more dangerous.
Buildings that host important activities or a lot of people need stronger security measures.
Looking at the current configuration to see if there are any gaps or weak points A lightning protection system is made based on the findings of a risk analysis to find the right balance between safety and cost-effectiveness. It also helps decide which inspections and maintenance programs are most important.
Why Earthing Audits Are Important
Grounding, sometimes called earthing, is a prerequisite for any lightning protection system. This channel lets lightning safely fade into the ground. An earthing audit is a systematic check of how well the earthing system works and how well it is working.
An audit of the lightning protection system might show problems with the earthing system. After that, you may adjust the connections, add extra grounding rods, or make the dirt more conductive.
Putting these services together for complete security
For complete lightning safety, it is important to combine surge protection inspection, lightning risk assessments, earthing audits, and lightning protection maintenance into one program.
Companies should use qualified professionals who know how to test lightning protection systems and what the rules are. Facility managers and maintenance workers may assist keep the workplace safe by taking part in regular training and awareness programs.
Conclusion
When lightning strikes, it may be quite dangerous for structures, machines, and humans. The first step in lowering these risks is to put in place a well-planned lightning protection system.
Regular Surge Protection Inspection, lightning risk assessments, earthing audits, and lightning protection maintenance are all important to keep the system working effectively.

Strategies For Preparedness
In Our Communities
Tarpon Springs, FLA Wednesday 7.29.26
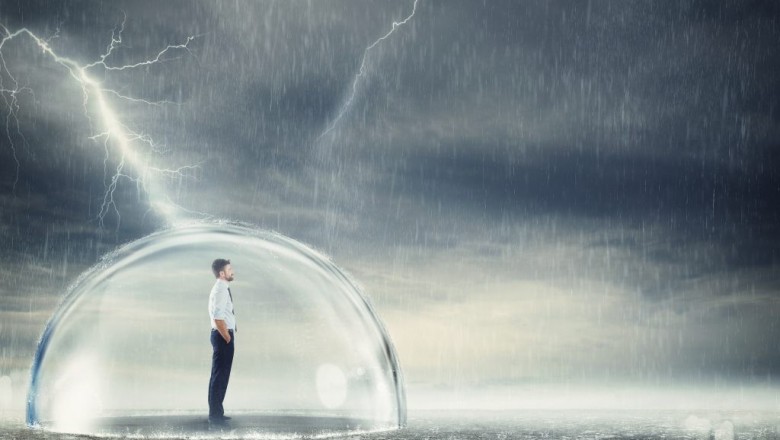
A culture of preparedness is fostered by actively engaging community members in resilience-building efforts, moving beyond top-down mandates to empower citizens at the grassroots level. Effective strategies combine public education, resource-sharing, and collaborative planning to build social cohesion and collective capacity before a disaster strikes.
Promote public education and awareness
Integrate disaster awareness into daily life. Make emergency preparedness a routine part of community life, not just an annual or monthly campaign. This can include integrating preparedness education into school curricula, civic group meetings, and employee training.
Leverage multiple communication channels. Use a variety of platforms to disseminate information, ensuring that messages reach a broad and diverse audience. Strategies include using:
Trusted local messengers like faith-based organizations and community leaders.
Modern platforms like social media and mobile apps to provide alerts, updates, and educational materials in real-time.
Traditional media like local newspapers, newsletters, and bulletin boards.
Provide accessible, culturally relevant information. Tailor communication and resources to meet the specific needs of diverse populations, including those with disabilities, non-English speakers, and older adults. All materials should be available in multiple formats, such as plain language, large print, and Braille, and interpreters should be provided for public meetings.
Strengthen social capital and build relationships
Encourage grassroots initiatives. Support and empower community members to organize and lead preparedness efforts themselves.
Examples include:
Neighborhood Watch programs, which have expanded their focus from crime prevention to include disaster readiness and emergency response.
Community Emergency Response Teams (CERTs), which train citizens in basic response skills like first aid and search and rescue.
Youth preparedness programs, which teach emergency skills to children and empower them to influence their families and peers.
Strengthen trust with first responders. Regular, positive interactions between community members and emergency services personnel can foster trust and improve cooperation during a crisis. Activities can include joint training drills, school visits, and community safety fairs.
Build a culture of mutual aid. Encourage neighbors to look out for one another and organize local support networks before a disaster. This strengthens interpersonal connections and enables faster, more effective informal response in a crisis.
Empower individuals and organizations
Provide actionable training. Offer practical, hands-on training sessions and educational workshops on first aid, CPR, and other survival skills. Make sure to offer these trainings in accessible and convenient locations.
Engage the business community. Local businesses are vital to both preparedness and recovery. Communities can encourage them to:
Develop business continuity plans and practice emergency procedures with employees.
Form partnerships with local emergency services to share resources and coordinate efforts.
Sponsor community events and education campaigns to raise awareness.
Organize community-led risk assessments. Involve residents in identifying and analyzing local hazards, vulnerabilities, and resources. This participatory approach ensures that preparedness plans are tailored to the community's unique needs and priorities.

Strategies For Integrating Emergency Preparedness Readiness Into Our Public Schools
Kentucky Lake, Marshall County, KY Friday, 7.31.26
Integrating preparedness into school curricula can create a lasting culture of resilience by equipping students with lifelong safety skills. Rather than treating it as a standalone subject, schools can weave preparedness into existing coursework and activities to make it a seamless, engaging, and relevant part of the student experience.
How to embed preparedness across subjects
Science and STEM classes
Study local hazards: Use a project-based learning approach where students research and report on natural disasters common to their area, such as hurricanes, floods, or wildfires.
Design for resilience: Challenge engineering and technology students to build flood-resistant homes, design robots for search and rescue, or develop new disaster alert technologies.
Simulate emergencies: Hold health-focused STEM activities where students learn and practice triage, first aid, and CPR.
Analyze data: In math or data science classes, analyze the frequency of past disasters in the region to look for patterns and help forecast future risks.
History and social studies
Case studies: Explore historical disasters and how different communities responded. Students can analyze the effectiveness of past emergency plans and draw lessons from both successes and failures.
Policy and government: Examine the role of government agencies like FEMA during and after disasters. This can lead to discussions about policy-making, resource allocation, and social equity in recovery efforts.
Community resilience: Connect students with local emergency managers and first responders to learn about their roles and responsibilities. This builds trust and shows how preparedness is a shared community effort.
English and language arts
Write for a purpose: Have students write informational guides or create public service announcements (PSAs) about emergency preparedness for different audiences, such as children or senior citizens.
Journaling and storytelling: Encourage students to keep journals to reflect on emergency drills or discuss their feelings about disasters. For older students, literary analysis of disaster-related texts can help them process fear and trauma.
Physical education and health
Drills and skills: Regularly practice evacuation, shelter-in-place, and lockdown drills. After each drill, hold a discussion to evaluate what went well and identify areas for improvement.
First aid and CPR: Offer opportunities for students to earn certifications in first aid and CPR, providing them with critical, hands-on life-saving skills.
Mental health: Teach students coping mechanisms for stress and anxiety related to emergencies. Provide resources for emotional support and incorporate mental health discussions into emergency drills.
Implementing preparedness with community partners
Invite guest speakers: Invite local first responders, health officials, and emergency managers to speak to students about their experiences and preparedness tips.
Organize school-wide events: Host community events like a "Fire Prevention Day" or a "Safety Fair" where students, families, and community groups can interact and learn together.
Involve parents and guardians: Provide resources and encourage students to create a family emergency plan. This reinforces learning and helps build community-wide resilience from the ground up.
Collaborate with local agencies: Partner with organizations like the American Red Cross for training and disaster simulation exercises.
Resources To Support
Emergency Preparedness In Our Public Schools
Hudson Beach, FLA Wednesday, 7.1.26
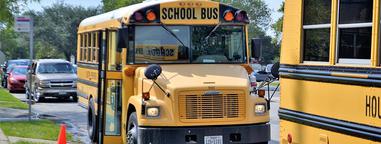
Many national, state, and local organizations offer free resources, tools, and training to help schools develop and implement robust emergency preparedness curricula. These resources provide curricula tailored to different age groups and address a variety of natural and man-made hazards.
Federal resources
FEMA's Ready Kids and Student Tools for Emergency Planning (STEP): These programs from the Federal Emergency Management Agency (FEMA) offer resources designed for various age levels.
STEP is a curriculum specifically for students in grades 4–5.
Ready Kids provides videos, fact sheets, and online games that cover the basics of emergency preparedness for different disasters.
Readiness and Emergency Management for Schools (REMS) Technical Assistance Center: Operated by the U.S. Department of Education, REMS provides guidance and tools for developing comprehensive, all-hazards Emergency Operations Plans (EOPs) for schools and higher education institutions.
Resources include the EOP Assist software, which helps schools customize their emergency plans, and the SITE ASSESS app for conducting school safety inspections.
REMS also provides training packages on specialized topics, such as resilience for educators after a crisis.
SchoolSafety.gov: This federal website is a clearinghouse of information and resources for school safety, security, and emergency management.
It offers guidance, training, and funding opportunities related to a variety of school safety issues, including emergency planning, mental health support, and threat assessment.
Centers for Disease Control and Prevention (CDC): The CDC offers guidance and resources related to health-specific emergencies in schools.
Their School Preparedness Unit (SPU) develops partnerships and materials to help schools prepare for public health emergencies.
Resources are available to help schools and families manage issues related to disaster recovery, trauma, and coping with stress.
Nonprofit and local resources
American Red Cross: The Red Cross offers educational programs and materials for both students and staff.
The Pillowcase Project is a free program for students in grades 3–5 that teaches coping skills and safety information for local hazards.
Prepare with Pedro is another program aimed at younger students, featuring a storybook and activities to prepare for home fires or local hazards.
For staff, the Red Cross offers group training in CPR, First Aid, and Automated External Defibrillator (AED) use.
Community Emergency Response Teams (CERT): Many communities offer CERT programs that train local residents, including students, in basic disaster response skills such as fire safety, medical operations, and light search and rescue.
Some areas, like Los Angeles, have Teen CERT programs specifically for high school students.
Local and state emergency management agencies: Most state and local emergency management offices provide resources, training, and support tailored to specific regional hazards.
In Hillsborough County, Florida, for example, the CERT program offers free training sessions to residents.
Interactive learning tools: Organizations produce creative and engaging resources to teach kids about preparedness.
Ready 2 Help is a card game from FEMA and the American Red Cross that teaches kids how to respond in an emergency.
The Extreme Event role-playing game from the National Academies of Sciences helps middle and high school students build community resilience in a simulated disaster.



Preppers Checklist:
10 Things To Do Now!
Holiday, FLA Wednesday, 7.1.26
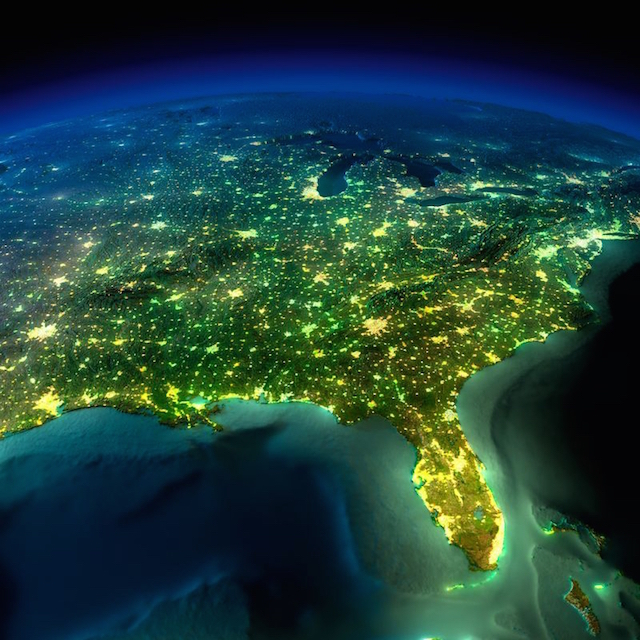
No matter how much preppers beg, some of you, no doubt haven’t done anything to prepare (you know who you are). We don’t know what else to do. All we can do is give you the information, it’s up to you to act. No one can do it for you. No doubt some of you are intimidated by repeated suggestions of storing and using whole grains and beans. If it doesn’t come from the supermarket shelf it’s strange and unfamiliar and you want no part of it. Fair enough?
But you still need to prepare. Here are ten things that you can do now that will make you better prepared than 90% of the population. And everything is available at your local shopping center – so it’s easy.
You can do all ten steps at once or divide each into a separate week and shopping trip. But you need to get it done as soon as possible. Keep in mind that this is only a starting point and isn’t presented here as a completed list.
1. Head to the nearest Wal-Mart, Kmart, Costco or whatever and pick-up 20 lbs. of white or brown rice and 20 lbs. of pinto beans. White rice has a better storage life while brown rice has more nutritional benefits – your choice.
2. While you’re there grab 5 lbs. mixed beans, 5 lbs. of white sugar, 5 lbs. of iodized salt, one gallon of olive oil (can be frozen to extend shelf-life), 5 lbs. oats, 10 lbs. each of white or wheat flour and cornmeal.
3. Now head over to the canned foods and pick-up 20 cans of canned fruits and 20 cans of canned vegetables. Be sure to buy only those brands and contents you normally eat and nothing exotic. No need to shock the senses.
4. Now over to the canned meats. Pick-up 20 cans of various meats, salmon, stews, spam and tuna. Again buy only those brands with contents you normally eat and nothing exotic.
5. Okay. Now to the to the peanut butter shelf and toss two 40-ounce jars in the cart. The listed shelf life is just over two years and each jar has over 6,000 calories. Peanut butter is an excellent instant survival food.
6. Over to the powdered drink mix – go on I’ll wait…Okay, pick up two 72 Ounce Tang Orange drink canisters (provides 100% of the US RDA vitamin C requirement per 8 oz. glass). Also, grab six 19-Ounce Containers of Kool-Aid Drink Mix.
7. Off to the vitamin and supplement aisle, pick up 400 tablets “one a day” multivitamin and mineral supplements. I buy this brand at the local Wal-Mart – comes in 200 count bottle for $8 each.
8. Now to the department we all love – sporting goods. Go to the camping aisle and pick up 4 five gallon water containers. Fill with tap water as soon as you get back home.
9. While you’re there buy 250 rounds of ammunition for your primary defensive weapon. More if you can, but this will be a good start. Also a good universal cleaning kit.
10. And lastly, pick up the best LED flashlight you can afford, extra batteries and bulb. Also, grab two boxes of wooden matches and several multi-purpose lighters. Don’t forget to date, use and rotate – remember first in first out. Let’s get started. What would you add to the list?
10 More Things To Do Now
Now let’s go back to the shopping center with another survival food and gear list and ten more things to do now. Ready? Great.
1. Go to the grocery department and pick up 5 lbs of powdered milk or the equivalent of canned, now go over to the next aisles and throw in 5 lbs of rolled oats and a case of Ramen noodles. Ramen noodles aren’t the most nutritional food but they are cheap, add bulk to the diet and store well – just don’t rely on them to provide all your nutritional needs. And don’t forget a good manual can opener.
2. While you’re in the grocery department be sure to pick up an assortment of spices to taste, such as Basil, Chili powder, Cinnamon, Garlic, Sage, Marjoram, Oregano, Rosemary, Thyme and Black Pepper. Spices can go along way toward making unfamiliar foods palatable. Also, while you’re in that area add 5 or more lbs of salt to your shopping cart, as you know salt has 101 uses.
3. Okay, counting what you bought during our first trip to the shopping center, that should do it for the grocery. Now go over to the area near the pharmacy and pick up 3 large tubes of toothpaste, 3 brushes, 100 double edge razor blades, (note: if you don’t have a razor you’ll probably have to order one from Amazon.com and don’t forget a brush and bowl), I’ve used this type razor for years and think it is a cheaper long-term solution than disposable.
While you’re there, add the most comprehensive first-aid kit that you can find to your cart and don’t forget over the counter pain meds (Tylenol, aspirin etc.). If you’re a woman (or have one in your life) go over a few shelves and pick up enough “feminine” supplies to last three months or longer.
4. With all that food in your pantry its only a matter of time before you have to poop. I know, it’s shocking but we all do it. If you have a water source such as a stream or lake nearby you can still use the toilet in your bathroom, all you have to do is manually fill the tank in back and flush as usual. If this isn’t an option, you’ll need to look for other alternatives such as the Portable Toilets sold in the sporting goods department or making a sawdust toilet from a five-gallon bucket.
5. What’s next? You guessed it toilet paper. If you poop you need to wipe, if not you probably need to start. You could use a corncob, cloth, Roman sponge on a stick or paper from discarded books or newspapers but I would wager most of you prefer the softness of Angle Soft. Get enough to last at least a month, more if possible and remember women need more than men so plan accordingly.
6. While you are in that area of the store pick up a supply of disposable plates, bowls and plastic utensils. Don’t go overboard here but having a small stockpile of these items on hand can save a lot of water that would otherwise be used to wash dishes. Also add two or more gallons of regular, unscented bleach to your cart.
7. This is a biggie and can’t be done (legally) at the department store pharmacy without the signature of a doctor – that is stocking up on prescription meds. Getting more than a 30 day supply, at least in the U.S., can be difficult if not impossible. But there are ways to get most of what you need for long-term survival. See this post and this one and this book (note: some of the information in the book is dated but there is still good advice to be found).
8. Now push your cart (man this thing is getting heavy) over to the hardware department of the store and pick up a carpenters hammer, vice grips, adjustable wrench, screw driver set, duct tape, electrical tape, axe, pry bar, crosscut saw, hacksaw and large can of WD-40. This is your bare minimum survival tool kit.
9. After you get your tool kit, go over to sporting goods and in the camping supply aisle pick up a propane camp stove and 5 or more 1 pound propane cylinders or a bulk 20 lb tank and hose adaptor – yes the pressure in the small bottles is the same as a 20 lb cylinder or even 100 lb tank, just be sure to get the proper adapter and hose assembly. Another alternative and the one I prefer is the Volcano Stove because I can use propane, wood and charcoal.
10. Okay, we are just about done for today – only a few more steps pushing the cart and you’ll be out the door. You’ll need a way to keep in touch with your group so go to the electronics department and pick up the best two-way radios that you can afford – I have these. Don’t forget a battery-powered radio and extra batteries for both. While not necessary, I prefer a radio capable of receiving AM/FM and shortwave broadcasts – I have this one.
This shopping list will have you better prepared than probably 90% of the U.S. but it should not signify the end of your preps only a good start. There’s always something to do and learn never become complacent – remember the quote “On the plains of hesitation lie the bleached bones of those who on the very threshold of victory sat down to rest, and while resting died.
Ten Little Known Ways to
Save Money on Building Your
Survival Food Storage Stockpile
Kentucky Lake, Marshall County, KY Wednesday, 7.1.26
For a while now, many preppers have been stocking up on food and drug store items. For many, it started after a hurricane. Many people got a taste of what it’s like to live without electricity and have all the grocery stores and restaurants around you shut down for several days. Suddenly it became about much more than hurricane preparations.
Many people watched the news and thought someday they could lose their job, someday there may be a war on US soil, someday this country’s finances are going to collapse. So, for many, stocking up on things now gives them peace of mind. If alot of things are unavailable in the future, or if they cannot afford them in the future, they will be ready from doing preparedness activities.
With the ongoing droughts, crazy weather patterns, random earthquakes, job losses, foreclosures, rising food and transportation costs, flash mobs etc. many alert people are hearing alarm bells. After our bond rating went down recently, they got louder. Many people feel like something we all hoped would never happen, could soon become reality.
Point being – if you haven’t started stocking up, please start now. That means food and water for at least three months, ways to stay cool/warm, ways to cook if the power goes out, ways to purify water, medical supplies, seeds for the garden, and ways to defend yourself (or if self-defense makes you uncomfortable, align yourself with people who can help you defend yourself if it comes to that).
If you haven’t seen what happened in Greece, or what’s happening in London, just imagine when the American people have had enough, or can’t get enough. Remember Hurricane Katrina? It could be very ugly.
We can’t cover everything in one article, that would take a book, but here is a crash course on stocking up, primarily on food:
1) Coupons. At Walgreens and CVS you can get stuff for free practically every week… vitamins, body wash, hair clips, razors, toothpaste, toothbrushes, mouthwash. You pay out-of-pocket, then they give you rewards dollars to use next time, and you keep rolling them.
Walgreens also has store coupons in their circulars for cheap food pretty much all the time. If there is a BOGO sale and you have a BOGO coupon, you get both items free. Search the internet. I use SouthernSavers.com and they list all the deals and coupons for you.
If nothing else, think of these as potential barter items, but the vitamins are definitely a good item to keep on hand when you’re not getting the nutrition you should and your stress level is through the roof. To me, Wags and CVS trips are fun. I go in and get over $200 retail value, pay maybe $20, and get $15 back to spend next time… that’s pretty typical and it doesn’t include rebates that some manufacturers offer.
2) Clearance Aisles – My grocery store has a clearance section where (for example) I’ve been finding cans of pinto beans for 20-cents, and they aren’t close to their expiration date nor are they damaged, they just aren’t selling or maybe the brand shut that line down. Even outside the clearance aisle they have bags of beans for 99-cents every day. Throw a bag in your cart each time you shop. (and find some recipes to make them taste good or you’ll hate yourself after the first week… did you know they have pinto bean pie??? It actually sounds good.)
3) Amazon Subscribe & Save – I ran across this when I was looking for healthy, portable, food that doesn’t require refrigeration for my husband who is currently in Afghanistan, plus I also realized that I could keep some on hand for hurricane season.
You subscribe to their shipment service and get a 15% discount, shipping is free, plus they ship your order automatically in 1, 2, 3 or 6 months increments that you choose. They notify you prior to shipment and you can cancel one shipment or all shipments.
This is not a Guthy-Renker kind of cancellation, you do it on their website, it’s automatic, no one hassles you – it’s GREAT!!! I buy pouches of applesauce (baby food, but hey… it’s good), dried fruit, shelf stable sandwiches, etc. On occasion they even offer additional coupons to entice you in; if it’s something you would have bought anyway, that’s a great deal!
4) eFoods Global – They will send you three free entrees of your choice. You have to watch a video that tries very hard to get you to become a distributor… do as you wish, I ignored it. During the video they have a few poll-type questions, answer however you choose.
After that you select your entrees and pay $10 for S+H, and they deliver it to your house. I got one followup email asking if I’d tried it yet and what I thought, but after that no contact, no hassle. I didn’t give them my real phone number, so I can’t say if they tried to call or not, but I doubt it.
I was hesitant to pay the S+H, but my husband thought it was reasonable, and after the box arrived it did seem to be… the bags were larger than I expected and the weight of them probably did justify the cost. They look delicious (I am not a distributor).
5) Thrive Foods – This site has pouches available so you aren’t investing in #10 cans unless you want to / need to (but they do have #10 cans). They also have interesting items like freeze-dried shortening, powdered eggs and freeze-dried butter. Hell, I want it just because every time I buy shortening it goes bad before I use it, and since I married a Cajun… I need to learn to cook gumbo. They also have a “Q” where you set a monthly budget, add the items you’re interested in, and they will automatically group and ship the items to you. (also not a distributor)
6) Coleman Camping Meals – If you don’t want to order anything online, these are available at Target in the camping section and are probably also available at other places where they sell camping equipment. My husband said the cheesy pasta was really good.
7) The fish aisle (for if it REALLY gets bad) – I never knew this, but fish use antibiotics, and you don’t need a prescription to get them. Farm supply stores carry them as well. I hope never to need them, but if I do, I have them. Amazon.com has several suppliers of amoxicillin, tetracycline, doxycycline, erythromycin, penicillin, etc. I saw some at PetSmart, but it was in powder form (not a capsule) so I passed on that.
You shouldn’t use antibiotics if you don’t have to, and until it gets to the point that there is no doctor to prescribe them to me I have no intentions of ever using them, but it makes me feel better to know they’re there. That said, you need to know how to use them, so you will also need some sort of PDR or nursing book, I found an AARP guide to pills at my local used bookseller for $10. Raw garlic also has antibiotic properties if you want to go that route instead. Google it and the info is out there.
8) Clove oil – Good for toothaches.
Lavender oil – a topical disinfectant, also repels fleas.
Cedar oil – magic against bugs and safe for humans and pets, young and old.
9) Church of Latter Day Saints – I don’t care if you’re Mormon or not, and neither do they. They offer #10 cans of several pantry staples at less than a lot of the emergency food type websites. They also have a starter kit. There is no follow-up contact, they slip a pamphlet in the box and they’re done:
10) Bath & Body Works – Believe it or not… They regularly have 5 for $15 or 7 for $20 antibacterial soap sales, especially around Christmas time. It’s an inexpensive way to stock up on soap, and not just soap, but soap that smells like heaven. I’m not just saying that because I’m a woman, I think that when things get bad you need a little normalcy in your life and things that make you feel good… treats if you will.
If and when a disaster strikes, be warned that you shouldn’t go out there smelling all good when everyone arounds you stinks or you'll
stick out like a sore thumb and everyone will know you are not suffering like them. Sometimes dreams can be very insightful, but blending in is another topic altogether
What you stock up on and in what quantities is up to you. The trick is not to concentrate on just one aspect of prepping, or to get bogged down by the enormity of the task.
Start with what is most immediately possible where you live… on the west coast that’s earthquakes, on the gulf coast it’s hurricanes, in the north it is snowstorms. Branch out from there and tailor it to your needs. Little by little you’ll start to build up a stash that will give you piece of mind.
SIGN UP FOR OUR NEWSLETTER!
Subscribers to the AlreadyPrepared.com newsletter are a thriving community of readers eager to learn more about Survival & Preparedness solutions, strategies and tactics and to find ways to reduce their own impact during an emergency or disaster and to protect the safety and security of their families and
loved ones during such an event.
Here is some of the great information you’ll receive: Survival & Preparedness Alerts,
Survival & Preparedness Tips, Survival & Preparedness News Analysis, Insightful Opinions & Feedback
Your privacy is important to us!
You can unsubscribe from the newsletter any time and we will never give away your email address.
We follow strict privacy safeguards

Tips From A Survivalist
On Saving Seeds
Kentucky Lake, Marshall County, KY Wednesday, 7.1.26
There are no guarantees in this world we live in today. We can’t rest assured that the grocery store will always be there or that its shelves will always be stocked full of food. We can’t count on our local home supply store having rows and rows of different seed packets to choose from if we were to ever need to grow our own food. We need to face the reality that things may “go south”, and if they do, we’ll only be able to count on ourselves, and the skills and knowledge we have acquired, in order to survive.
Here are a few tips on how to store your own seeds. These are tricks people have picked up from their mother or grandmother/grandfather as well as other survivalist and organic gardeners and have learned the hard way or adapted some of the methods included here.
Don’t use genetically modified seeds in your garden; use heirloom seeds. Mankind has survived and flourished for thousands of years planting heirloom seeds, and why we decided to start messing with seeds 40 or 50 years ago is beyond us. If we are ever thrown into a world where we need to grow our own food to survive, you want plants that are grown naturally and contain the most nutrients. Hybrid seeds, and the plants they produce, have been shown to contain much less nutrition than organically grown plants, and often, they require much more maintenance to grow successfully.
In addition, hybrid seeds can’t be saved. The majority of them turn out to be duds, and when new plant life should be growing in your garden, you’ll be faced with a less than 20% growth rate. Yeah, you may survive that first year, but when year 2 comes along, you’ll be starving.
Now, after your harvest, be sure to save as many seeds as you can—it’s much better to have too many than not enough. Bring your seeds inside and lay them on paper bags in a cool, dry place to draw-out the moisture in the seeds.
Okay, done. But here’s where people get stuck: What do you DO with all those seeds? How and where should you store them? How long will they keep?
How should you store them? The best way many people have come up with is to store them in mason jars. You can also use old baby food jars but those are difficult to find anymore. Either way, a water-tight jar with a secure lid will do the trick. You may even want to purchase some silica packets to throw in with the seeds to draw-out any extra moisture.
The best suggestion as the where to store them is a cool, dry place. Some people will store seeds in the refrigerator or freezer, some people have dry basements or cellars to store them in, and some people have sheds/garages they can store their seeds in. Regardless of where, cool and dry is key. If you choose to store them in your refrigerator or freezer, definitely use the silica packets.
And how long can you keep the seeds? How long will they be viable? It really just depends on the type of seed. What many people do is date the seeds so that you know how long they’ve been in the jar. Then, each Spring, plant a handful of each kind from the oldest jars to see if they grow. What others have found is that most seeds will last 4-5 years but not much longer.
If you are not already saving seeds, it would be very wise to start. It does not take much time or energy, and these little seeds could save your life in the future, so it’s completely worth it. It would be wise to research your area to find out what kinds of plants grow best where you live and if the seeds of these plants require any special treatment. Knowledge is the best tool you can have when it comes to survival. Thanks for reading!
How to Make a Seed Starter
Out of a Medicine Cabinet
Holiday, FLA Friday 7.31.26
Mirrored flush-mounted bathroom medicine cabinets are easily one of the most non-upcycled objects out there. They are short and shallow. They don’t stand by themselves. And, frankly, they aren’t very nice to look at once they are out of their recessed wall enclosure.
But, the thing is, just about every house has one…sometimes two or more. You can pick them up for a song at garage sales, rebuilding centers or CraigsList. Sometimes they are free at all these places, because very few people actually want old medicine cabinets. New ones are cheap. Also, old ones are frequently….um….not as fastidiously clean as one would prefer.
Old medicine cabinets may seem useless if you look at them as cabinets, but if you look at them as hinged lid boxes, the possibilities to use them for other purposes are vastly improved.
One of the things they are great for, once you see them as a box, is as a seed starter box.
First, you must take all the shelves out. If you are lucky, they are clear glass shelves that you can tape together to make a nice glass sheet out of. Most medicine cabinets seem to have these sorts of shelves. If yours doesn’t, don’t despair, use a piece of window glass or clear plastic or even cling wrap instead of the taped glass sheet. Put the glass away for now.
Second, you have to re-hang the door of the cabinet. The mirror needs to face into the opening. I’ll get to why this is so later in this article. Pull the pins out of the hinge, separate the two pieces. Take the mirror out of its housing, then mount a door hinge to the mirror housing, put the mirror back in, and mount the other side of the door hinge to the metal frame of the cabinet. It doesn’t have to shut like a lid or a door, it just has to move back and forth.
Third, take the wood and cut the middle out of it. Basically you are making a frame. Now, tape or glue the glass(or plastic) to this.
Line the interior of the cabinet with the aluminum foil. Top with the glass/wood frame.
Now, angle the mirrored door above the open part of the cabinet so that the most light possible enters the box. This is how the box will get warm enough to germinate seeds.
You can move this anywhere you want, because it is light and portable, making it a very handy sun catcher.
Put starter pots of seeds in it, water them. Set the glass frame in place. Then angle the mirror to catch the most light and there you have it. A seed starter you can use in any climate. We just used ours to germinate kale and cabbage seeds in early November.
And added bonus to this is that you can also use it to cook some foods. It’s a little small to be a powerful solar oven, and it is much slower, but it got a lentil dish cooked in time for dinner when we tried it out. (We used a sweet and sour lentil recipe adapted from Jay Solomon’s Lean Bean Cookbook)
Supply list:
1 Medicine cabinet
2 Old hinges (old door hinges work well)
As many screws as needed for the hinges
1 Piece of wood the same size as the cabinet
Packing tape (or a piece of glass/clear plastic smaller than the piece of wood above, or cling wrap)
Aluminum foil, Saw, hammer, screwdrivers,
Seeds, seed starter pots, water.
Growing an Actual Survival Garden
Tips and Advice to Get You Started
Holiday, FLA Friday 7.31.26
This time of year, many folks are thinking about gardening and wondering about becoming more food self-sufficient. Some fear Government regulations, some fear Corporate controls on supply, some fear the additives used by producers to increase gains, some just fear everything and are searching for some corner of stability in a mostly unstable world. Whatever your driving force to become more food self-sufficient, my hat is off to you.
But where should you start? Since we’re survivalists, I feel you should start with garden products that will provide you with a good amount of nutrition, are easy to grow, can be prepared for storage with the least amount of work, and will offer you a diet that is not too radically different from what you are currently eating (this is especially important for the very young and the very old). Potatoes, dry beans and peas, hard (winter) squash, carrots, corn and wheat will be the basis and, to round out your diet, honey (and bees for pollination), black oil sunflowers for, well, oil of course and apples for their sugar, minerals and vitamins. Other than eating more (different) squash and substituting sunflower oil in those areas you currently use butter, this diet should be acceptable to most folks.
And what about livestock? The addition of livestock can enhance your life or it can be a nightmare depending on your situation. Chickens are normally thought of as a basic necessity and many people will start raising chickens before they ever begin to grow enough crops to feed themselves – thinking they will have eggs and meat available if nothing else. But if you take a step back and look at some realities, the storybook homestead scenario doesn’t hold up.
A hen egg will give you somewhere around 90 calories, but each hen will need to consume about 300 calories a day to produce that egg. If you are set-up where your chickens can fend for themselves, every day of the year, summer and winter, and still get enough nutrition to produce eggs, then fine, chickens will be a definite plus to your diet. But if you must feed them 300 calories worth of grain a day, even for part of the year, to produce a single 90 calorie egg, then you’re running a loss you can’t afford for long in a survival situation without other compensations.
Dairy animals are usually the next step in the fairy-tale self-sufficient homestead evolution. They will give you milk, cream, butter, cheeses and an offspring you can slaughter for meat. But boy-oh-boy, they will cost you. A basic fact you should keep in mind – you’ll never get the calories out to match the calories you are putting in. Even setting feed issues aside, dairy animals require a daily commitment and a lot of work and that requires you to expend a lot of calories that you otherwise would not need to do. We want to keep the work necessary to feed ourselves to a minimum as much as we can in a survival situation.
And large meat animals? Hogs will consume about 6 calories of feed for every calorie of meat, a steer closer to 11 to 1. And then there is the problem of processing and preserving that quantity of meat without refrigeration in a survival situation. Now don’t get me wrong, there are definite plusses to raising livestock, but my advice is to get your basic nutritional needs taken care of first and then, and only then, think about advancement to that next level.
So let’s forget the livestock for now and concentrate on the simple garden produce that will actually keep you alive. The items listed above will provide you with plenty of calories and protein, and most of the vitamins and minerals you’ll need to survive. They are easily grown and just as important, they are easy to store after harvest – requiring minimal preparation. Potatoes, hard squash, carrots and apples are simply stored whole in crates or on shelves, and will last 4 to 6 months with very little care necessary on your part – beans, peas, corn, wheat and sunflower seeds are allowed to dry “on the vine” if possible, threshed, and then placed in vermin proof bins until you wish to use them – next week, next month, next year, 5 years down the road – they will be fine. Honey, as most here know, will store virtually forever. None of these foods require freezing, canning or dehydrating so the “screw-up” factor is about as minimal as you can get – and that is what you need if you’re looking to actually survive off your own land. Yes, freezing can preserve many foods and meats, but freezing requires a power source that may not always be available to you.
Canning requires the proper equipment, a lot of energy in the form of stable heat, and a lot of labor on your part. Dehydrating also requires extra heat energy input (although that can be provided by the sun) but again, a good amount of labor on your part is necessary to prepare the foods to dehydrate properly. All these methods have their place, but I suggest using them only to enhance your diet and not depend on them for your basic survival.
So how much will you need to grow? It depends on many factors, but I can share with you what quantities I grow to maintain my diet and maybe from that, give you some basis for your own situation.
First some background – I doubt my everyday at-home life will be much different after a SHTF type event. For much of my life I have lived mostly on what my homestead could produce, I’ve always lived “off-the-grid” except for my time working for the military and have always tried to do most homestead tasks using manual and animal labor instead of power equipment to maintain the skills my great-grandfather taught me.
My diet provides me with an average of 2,600 to 2,800 calories a day and that has been enough to maintain my health (I’m 6’5″ and my weight stays in the 212 to 220 range) and this amount of calories gives me enough strength and stamina to operate this homestead single handedly – at least for now (I’m currently 64).
I give this information simply as background as I know there will be folks who’ll say an individual will need thousands more calories a day once they must start doing their own hand labor, but my lifetime of experience shows that not to be true.
So let’s look at the quantities of these basic garden products that would be necessary to maintain my needed 1 million calories a year and my survival.
Potatoes: Potatoes offer you about 320 calories per pound and a good bit of protein. I suggest you grow 1,200 pounds of potatoes over the season, which will give you 384,000 total calories. I know that sounds like a lot of potatoes, but if you are like me and have them fried with apples for breakfast, mashed, baked, served in soups and grated into hash browns and pancakes, you’ll find they will disappear fast. And what kid doesn’t like French-fries? You do have to be a bit careful with potatoes due to their high glycemic index – basically your body digests them quickly and causes a quick release of sugar into your bloodstream – so in our survival scenario, frying them will actually be better for you during the day as the oil will slow this process and keep you from experiencing that energy spike followed by the lethargic feeling as your insulin levels overcompensate. You can’t afford to be “fuzzy-headed”.
I currently produce about 1 pound of potatoes per square foot of garden space but my area is perfect for growing potatoes. I’d say 80 pounds per 100 sq. ft. would be a safe estimate for most areas, so you should be able to grow this quantity in about 1,600 square feet of space. Most folks will plant seed potatoes (a sprouted piece of potato that will produce clones) but remember to also grow a few plants from actual seed so that you can harvest the potato seeds for storage and future crops. This is a survival garden so you don’t want to be growing all clones that could be wiped out by some form of blight or virus that could hang around and wipe out your next season’s crop also. Potato seeds will only produce small tubers so you’ll have to plant more, but their clones the following season will produce normal sized stock once again.
Hard (winter) squash: Just in case you didn’t know, winter squash is not grown in the winter – the name refers to hard skin squash that can be stored (after harvest) for use throughout the winter.



Why Be Prepared for Doomsday
Holiday, FLA Friday, 7.31.26
People prep for doomsday to mitigate catastrophic risks, secure vital survival resources, and establish control over modern existential or societal threats,
Why People Build Survival Redoubts (Real-World Prepping)
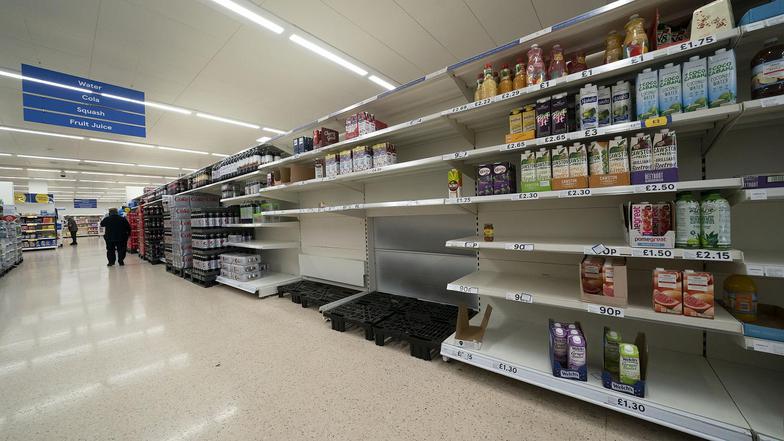
Supply Chain Vulnerability: Modern society relies on "just-in-time" delivery. A major cyberattack, grid failure, or pandemic can empty grocery shelves within days.
Climate and Natural Disasters: Severe weather events, EMPs, earthquakes, and extreme solar flares can permanently or temporarily knock out power and clean water access.
Geopolitical Instability: Rising global tensions and the threat of nuclear or biological warfare prompt individuals to build self-sustaining shelters.
Psychological Control: Preparing acts as a natural survival instinct. It channels existential dread and anxiety into tangible, productive tasks like organizing supplies.
Cascading Infrastructure Failures: Emergency services can become quickly overwhelmed during severe crises, leading to secondary chaos like fires and looting.
Core Essentials for Basic Emergency Preparedness
Whether face-to-face with a severe natural disaster or societal breakdown, emergency agencies like Ready.gov recommend keeping a 3-day to 2-week supply kit containing:
Water: One gallon per person per day for drinking and sanitation.
Food: Non-perishable, high-calorie items that require no cooking or extra water.
Medical Supplies: A thorough first-aid kit alongside at least a two-week supply of critical prescription medications.
Communication: A hand-crank or battery-powered NOAA Weather Radio to track emergency broadcasts.
Tools & Sanitation: Flashlights, multi-tools, wet wipes, garbage bags, and plastic ties.